
We are learning about the weather for school right now. And since we have been having some great weather for learning about weather, every day is a different season we thought it was a good time to plot and plan exactly what was happening in the lead up to Spring. So we built a couple of instruments and we are all set for a week of observation next week.
- Observe the weather: You need to take a look at your weather right now and consider what you will need to make a weather station. This is our weather, thanks to wunderground.com, and a view of our beach so that you can see our weather conditions… (If the picture is black with a sprinkling of lights, that’s because it is nighttime over here… look again in a couple of hours and you will see our daytime weather!!!)
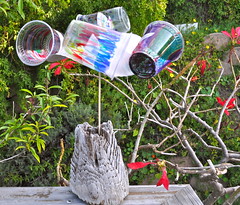
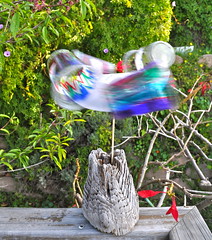
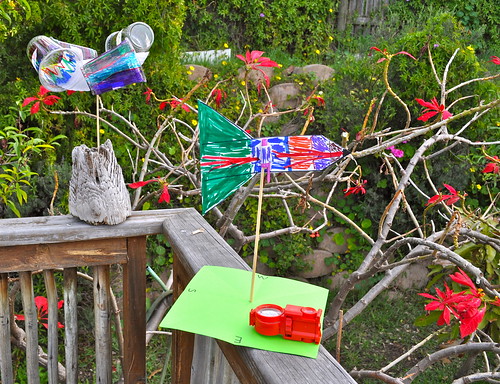
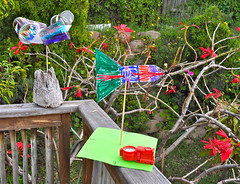
- An Anemometer.
- A Wind Vane.
- A Thermometer.
- A Barometer.
- A Rain Gauge.
- A Weather Chart.
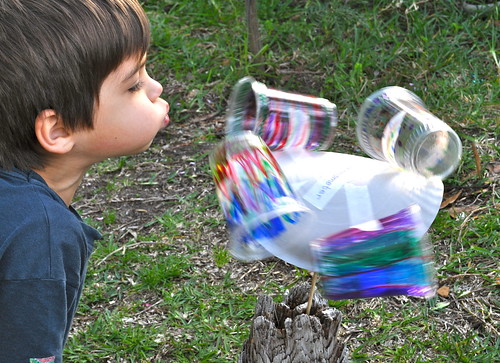
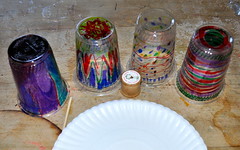
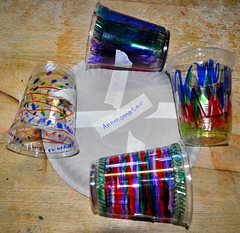
- An Anemometer: Measures wind speed.
- You will need four plastic cups, a paper plate, a skewer, a cotton reel and some tape.
- Decorate your cups, make sure they are all different so that you can see them spinning around when you are done.
- Tape your cups onto a paper plate.
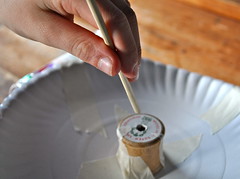
- Tape your cotton reel to the other side of the paper plate.
- Place your skewer into something firm, the ground, we used a tree stump.
- Place the cotton reel onto the skewer and let your anemometer spin in the wind.
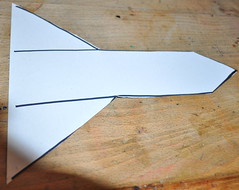
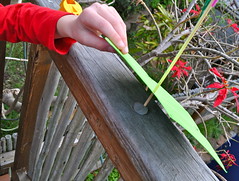
- A Wind Vane: Measures wind direction.
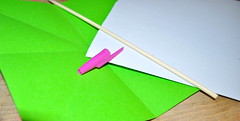
- You will need some card, a square piece of paper, a skewer, a pen cap, some tape and a compass to set it up.
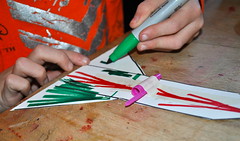
- Draw a large arrow shape on your card.
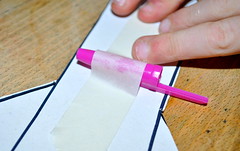
- Tape your pen lid to the arrow
- Decorate your arrow.
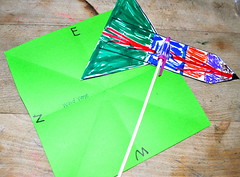
- Place compass points along the four sides of your piece of square paper.
- Use a lump of placticine to hold your skewer in place and slip your piece of paper onto the skewer as well.
- Set your compass up directed towards North and align your paper, with the compass points, with it. North aligned towards the north.
- Pop your pen lid onto the top of the skewer and your wind vane will spin around and align with the wind. You measure the wind from the direction it comes, so a south wind comes from the south.
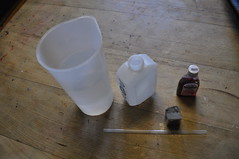
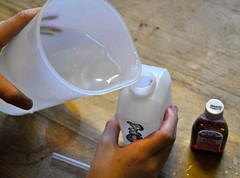
- Thermometer: To measure the air temperature.
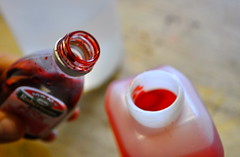
- You will need a cool drink bottle, a straw, some plasticine, and a drop of food coloring.
- Fill the bottle with water and add a drop of food coloring to the water.
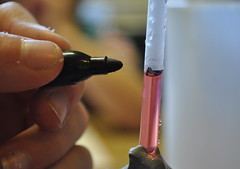
- Place straw into the bottle and carefully seal the opening shut with the plasticine.
- Make sure your bottle of water is full enough for some of the water to go up the straw.
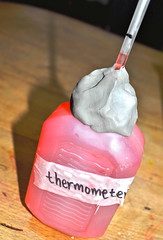
- Mark a line at the level of the water… that is the “temperature of your thermometer.”
- If you check your thermometer then the red water should rise slightly for warm weather and it should drop for cooler weather. We made our thermometer in the middle of the day and you can see that by the evening the temperature had dropped and the level of the water dropped with it.
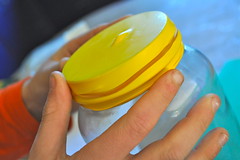
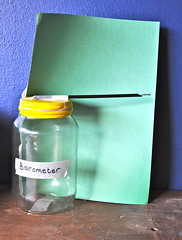
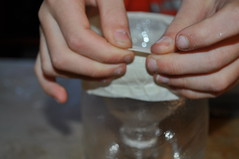
- Barometer: To measure the air pressure.
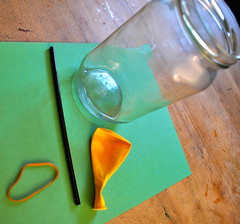
- You will need a glass jar, a balloon, an elastic band, a straw, a piece of card and some tape.
- Cut the end of the balloon off.
- Stretch the balloon over the lid of the jar. And then pop the elastic band over that – you want it really airtight.
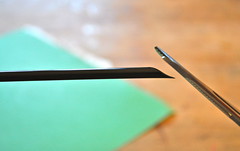
- Snip the end of the straw to make it nice and pointy.
- Tape the straw to the balloon.
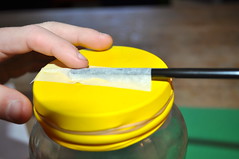
- Tape the card to the jar and mark the level of the straw.
- As the weather changes, so will the height of the balloon and the straw will rise and fall against the line on the card. If the air pressure rises, the balloon is pressed down and the end of the straw is pushed up. So if your straw is above the line on your card then the air pressure is higher than on the day you made your barometer and you will have fairer weather. If the pointer is lower than the mark you made on the card then the air pressure is lower than on the day you made the barometer and your weather will be worse.
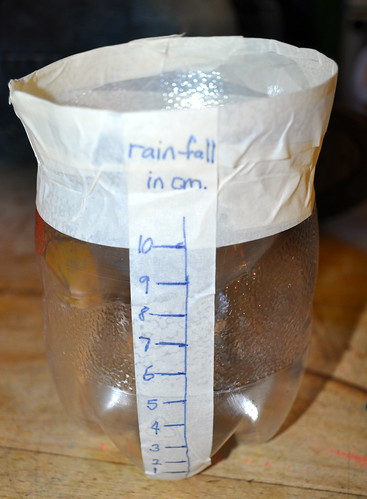
- A Rain Gauge: Measures the amount of rain that falls.
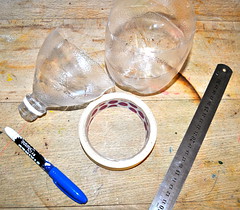
- You will need an empty soda bottle, some craft scissors, tape, a ruler and a marker.
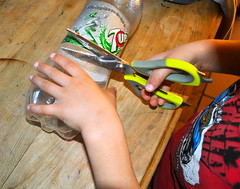
- Carefully cut the bottom off a soda bottle, you may need to ask for adult help it can be really tricky.
- Cut the top off as well and turn the top upside down in into the bottom piece of the bottle.
- Put tape along the join of the pieces of soda bottle. Then measure with a ruler in cm or inch marks, depending where you are from, up the side of the bottle and your rain gauge is ready for some rain.
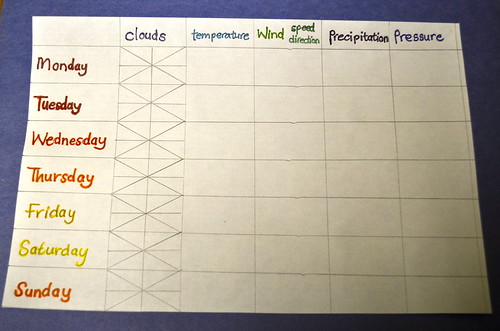
- A Weather Chart: For recording weather data. And here is a look at our weather chart all ready for Monday…
- Cloud coverage: The block is split into eight, that makes it a little easier to observe. Is one eighth covered or three eighths or even eight eighths!
- Temperature: Our thermometer is a comparative thermometer and does measure the temperature in degrees. We will get our temperatures from the website.
- Wind Speed and Direction: We need to download this accurate data as well.
- Precipitation: What type and how much. Our precipitation is generally rain and we can measure the amount with our rain gauge.
- Pressure: A barometer measures air pressure and ours is a comparative barometer, so we will need to get the details with our other readings off the web.
All weather stations need certain instruments and we will make:


This is what we plan to observe:
Finally, what we can not observe for ourselves using our instruments we will get a reading from the Wunderground website. You can search for your own location in this site and using the information, from the nearest weather station, you can get great observational data.
These experiments for part of the Sonlight C Science Course and we used this book for a lot of the experiments:

That’s us… Have a fun weekend!!! For once we are hoping for wild weather!!!
Wow! All of those weather activities/projects are AWESOME! Will be bookmarking this one, too. 🙂
WOW! These are truly amazing ideas. I love them and will definitely be doing some of these in the future.
Hay Karen M, So glad you like our weather station… Its weather, weather, weather around here right now!!! Hopefully we will have some fun weather craftiness next week!!! Hope you all have a fun, fun weekend!!!
Hi there Katharine, So glad you enjoyed them!!! Hope you have a great weekend with your little guys!!!
Thank you for sharing this. I look forward to setting up something like this.
Hi Sharlene, We had a lot of fun doing this… It generated lots and lots of discussion about all those things we normally take for granted.. the wind, the temperature and so on… Very fun!!! Hope you have a great weekend!!!
We did something similar last year, but our “equipment” did not hold up in a storm that ocurred shortly after we made them. (BUMMER!) The kids were so into it though, that we bought a small (tiny) weather station gizmo. A year later they still check that out. 😉
Hi there Christine, Funny thing is I never thought of buying a weather gizmo thing!!! I love too much in the “online” !!! Certainly sounds like you guys are getting your fair share of weather this week!!! Who knows how long our weather station will last, but they sure had a heap of fun making them!!! Hope your weekend is fun and all your kitchen dreams come true!!!
What an inspirational post! I’m going to have a look for that book. I will happily follow you!
Hi Miya, So glad you liked our project!!! Great to have you stop by and say hi!!! Have a good day!!!
We’ve just finished off the same section of SCI 2. We made the barometer and thermometer on Friday and I’m not sure who was more excited – the kids or me! What fun. Motivation not to lag behind in the experiments again – they’re too good to miss!
Oh how FUN!
I’d love it if you shared this with the Fun Family Crafts audience. FFC is similar to Craftgawker but it only features kid friendly tutorials. Looking forward to seeing what fun crafts you submit!
http://funfamilycrafts.com
Oh Sue, I so understand… Love it when we do it, just to get around to it!!! Why we always put the best parts off I don’t know!!! So hope uyou have a great week!!!
Hay Amanda, I would love to share, thank you so much for the invitation. Hope you have a great day!!!
wonderful, I can’t wait to do a few of these with my kids! thanks so very much for sharing on Craft Schooling Sunday!
Making a weather station is next on our list, so I’m bookmarking this. Hoping to use it to build graphs. Might resurrect our “hens laying eggs” graph and see if there is any correlation! Thanks for sharing the experiments.
Wow Cheryl, I never thought of correlating chicken laying to the weather… I am going to get my sister to count her eggs for the next couple of days, I think we are in for a few days of inclemency!!! Hope you have a fabulous day!!!
ha! You have beaten me to it.. a “weather station was on my to do list”… but kids are still small so I have plenty of time and now have your post to help inspire us!!! It looks fabulous and I love that you are measuring so many different things!
Thank you for joining Kids Get Crafty! 🙂
Maggy
Oh Maggy that is so funny!!! Sorry to pip you to the post, it really is worth doing and lots of fun!!! Hope you have a great weekend – we are freezing over here!!!
Wow… what a neat weather station. I love the rocket weather vain!
Hi Jill, We had a lot of fun making our weather station, so glad you enjoyed it!!! Hope you have a great week!!!
This is wonderful! Strange changing weather over here in Seattle (Pacific NW USA). Hot, then clouds and rain…..my little ones (5&3) will love this!
Hay Molly, Thanks so much for stopping by… Hope you enjoy it!!!