
For the longest time I have said we must get sewing, it is time. My kids aren’t getting any younger and they need to learn. I firmly believe that familiarity with the ins and outs of certain life-skills when you are a child enables you to ease into them when you are an adult. In the same way that it is easier to learn a new language that you ear became attuned to as a child. But I have been remiss, and our sewing machine has been firmly packed away in a closet for about 50 weeks of every year. And we all know that a machine or appliance that isn’t “out” isn’t used.
To this end we have declared a sewing day each week. I named it and they claimed it. The kids haul out the sewing machine out at breakfast time and it is out on the table and lots of crazy and inventive projects have followed… I gave them their freedom for the longest time because there are a lot of basics to learn and if I had made a list of things they needed to know I would have left a heap of things out. So I answered questions as they arose and leant a hand when needed. Finally we were ready for a project.
Sewing Basics
- Setting Up: We do keep all our sewing stuff in one drawer, easy to find and easy to access… but in order for your project to go well we found you actually need to have everything close at hand. You cannot begin and then need the pins, and settle down and need the thread and settle down and need the fabric scissors. It is important to have everything within arms reach… otherwise you can spend all your sewing time leaping about and you will be very unproductive.
- Seam Allowance: The first lesson in sewing was to allow a seam allowance – so many times projects were cut out – and this is why we use a scrap bin for all our sewing projects… and as they began to sew they realised that they hadn’t left any edges… and their project was going to be a lot smaller than they expected. Fine if you are making one of the million bags my kids have produced this year, not so fine if it is a garment.
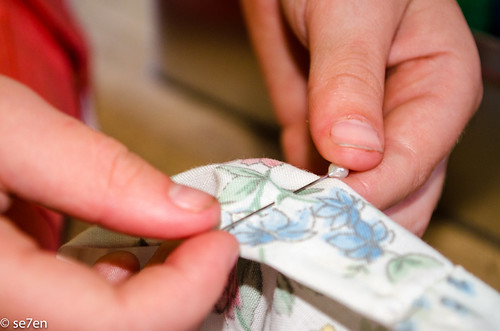
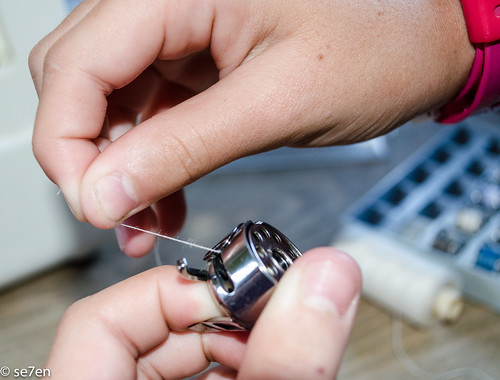
- Knotting the Thread: There is always a little bit of hand sewing involved… when I was in school we were expected to tack every seam before we sewed it… I don’t by any means expect that – a good iron and some pinning is sufficient. But they did need to know how to make that little knot in the end of their thread before they got sewing, to ensure that disaster didn’t follow.
- Proper Pinning: Before you sew anything you need to pin your fabric together, if you don’t the fabric can fly all over the place and seams turn out to be a lot more creative than you wanted them to be. Believe it or not there is a skill to pinning, I don’t remember learning it, but my kids needed to figure it out.
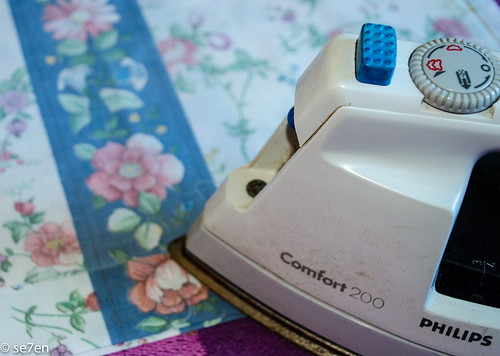
- Safe Ironing: Everything works better when it is smoothly ironed… when your fabric is more manageable and your seams have been ironed smoothly so that you can follow the lines… it just works better. Really without ironing first sewing is a bit of a nightmare. In a house where ironing is only ever used for fixing fabric paint – this was a whole new life skill
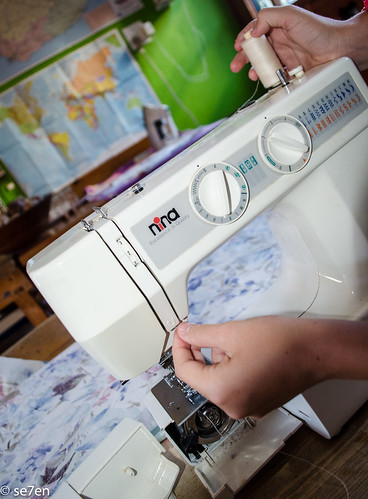
- Threading a Sewing Machine: This turned out to be a whole lot easier than I thought… I was still looking for the sewing machine manuel to show them and they simply followed the arrows intuitively.
- The Bobbin: Proved to be a little more difficult than threading the machine – just as we got it in place they needed to learn how to fill the bobbin before they were good to sew again… a bit of an exercise, but well worth it now that everyone has got the hang of it.
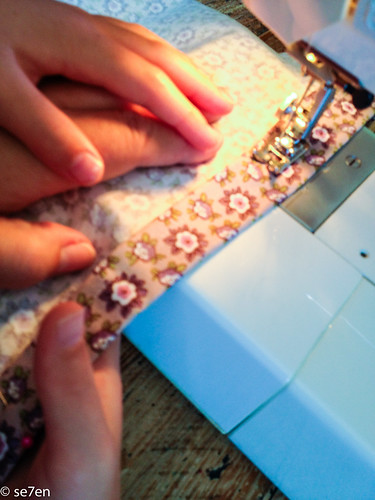
- Sewing Straight: I know kind of obvious… but even with pinning straight and ironing your fabric still needs to follow the guidelines, on the foot plate, to be straight. And a helping hand for a seam or two and we were flying.
And the se7en + 1th…
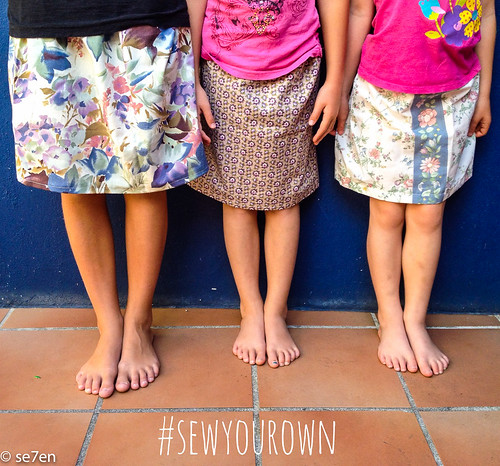
The Easiest Skirt in the World
So last Friday, all my boys had an outing and I was home alone with my girls – a rare event indeed. And whenever the sewing machine is out – the young men in our house tend to grab it for endless little projects. But we wanted to make something to wear and something we could start and finish in a morning… Enter the easiest skirt in a the world. We kind of began them a while back, but they have been sitting and looking at us for a while. So we worked on our plan…
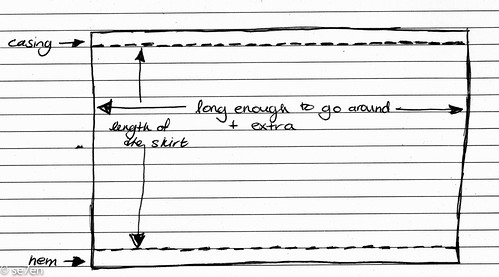
- Make a Plan: Now we are nowhere near sewing from a pattern, but we needed a plan. A rectangle of fabric long enough to fit around you about one and a half times. Measure how long you would like your skirt to be, that is the width of your rectangle.
- Add the Seam Allowance: You need to add about two inches to the width… one inch to make the hem and and another to make a casing for threading the elastic through.
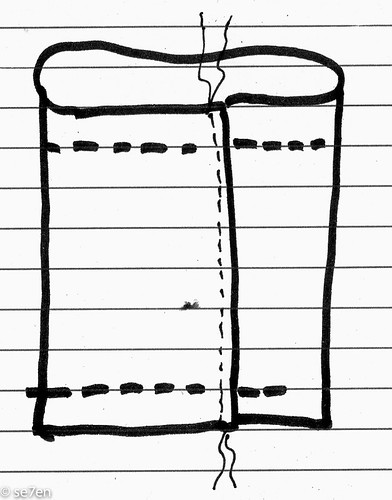
- Make a Tube: We began by sewing the ends of the rectangle together to make a tube… that your young seamstresses will love to try on – only to discover that they need elastic and fast.
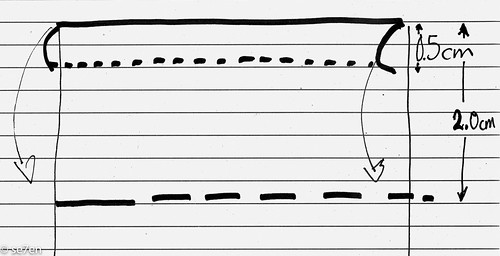
- Make an Elastic Casing Along the Top of the Skirt: We folded the top over by about five cm and sewed that all the way around, and folded that over again by about 2 cm to make a casing for the elastic. Don’t sew this completely closed – you need to leave a little gap for threading your skirt elastic through.
- Stitch the Hem: We repeated the process on the bottom, no need for any gaps, this is a hem and doesn’t need any elastic!!!
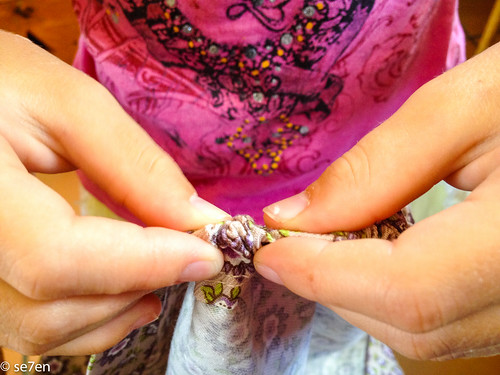
- Thread the Elastic through the Casing: Once you have sewn the elastic casing and the hem, then you have to thread the elastic through the casing. A tip is to fasten a safety pin to the one end of your elastic and then gently thread the safety pin attached to the elastic through the casing.
- Wear It: Finally, there you are… the quickest easiest skirt in the world.

Knot the Ends of the Elastic Closed: Jump into the skirt, while holding both ends of the elastic. Adjust the elastic to fit and tie a good knot and your skirt is done – really easy sewing and something to wear, almost instantly.
And the se7en + 1th step…

Oh I think I need to get that sewing machine out!
They must be so proud to wear those!
I’ve also, slowly, been delving into this sewing machine thing with my little miss. So fun. what you said about the threading… same same. Why do I make such a big deal about the little things?
Take care,
Olivia
Well done, ladies! I’m very impressed, as my mom taught me to sew as a child and I doubt I could do it now without a lot of help. 😉 The skirts are lovely and there’s nothing like the feeling of wearing something you made yourself!
Excellent job, girls!
My granny also taught me to push elastic through with a safety pin 🙂
I don’t iron… or sew. But I can sew a button and a hem by hand 🙂
Laura, How lovely to hear from you!!! I am so glad you liked their skirts… they loved making them and have had so much fun with sewing. You are right, they have worn them almost everyday since they made them – fun times!!! Hope you have the most wonderful weekend!!!
Oh Marcia, How wonderful to meet someone else who doesn’t iron – I just can not bring myself to do it!!! The kids have had such fun with sewing, I don’t think we will run out of projects for quite a while… forever really!!! Hope you have a wonderful weekend!!!
Fantastic, I’ll have to show this to my daughter! Great to see you on craft schooling Sunday!
Hi Sara, I know it’s been a while, thank you so much for stopping by!!! We were just exploring our next project today… Hope you have a great week!!!