
Here we are How Se7en do Christmas Cards, in the Clearly Christmas Series.
I know, I know… you can just pop an email off on the day:
Merry Christmas To All
But what could be nicer than a real live letter arriving in the mail. In this day and age when the post box is burdened with junk and demands – how lovely is it to get some real post…something lovely?
And in a time where friends are no longer in your local town but somehow we have spread ourselves around the world… What could be nicer than a real envelope arriving?
That’s why we do Christmas Cards – they are nice, they are fun and they are a little gift that we can send to the far side of the world…
Here is an anecdote to share, just how special Christmas cards can be:
A Christmas card just arrived…
Great excitement – some Hoods are just discerning that some mail isn’t just boring old bills… or worse junk for the bin.
Hood 1: “Ooooooo!!!! Its from Royal Mail”
Hood 2: “From our friends in England?”
Hood 3: “No silly from an actual princess”
…. many oooos and aaaaas and shrieks….
Hood 4: “From the postman.” Mumbled under his breath.
… many “can we open it?” “Let me see” grab grab….
followed by a beautiful glittery card…
Hood 3: “See. From an actual princess” (The evidence is in the glitter – of course!)
Hood 4: “From… (pause)… the… (pause)… POSTMAN”
Now, this whole project can seem overwhelming, but break it into bits and spread it over the month and you will be fine.
So this is how to do Christmas cards in Se7en Steps:
Step 1: Sort out your Christmas address list
We have a postage drawer where I keep the address book, and the post codes and envelopes and writing paper and so on… It is totally raided! So get out the address book and gather together a list of who you will be sending cards to. As cards come in from previous years I just pop the triangle off the back of their envelopes into the address book and if anyone’s address has changed I just paste the new address over it… this is a very used book – I like it like that! Somehow every address written in perfect hand just doesn’t feel lived in! And yes you can do it on your computer and print out addresses – but the whole point of Christmas cards – is home made and fresh.

Step 2: Get the envelopes organized
Gather together the envelopes you need and all things pertaining to the postage… this month I add a book of local stamps to the weekly shop, so that we aren’t suddenly hit at the end of the month with a postal bill. Overseas cards are another story and I brace myself for a trip to the post office at the end of the project.
Step 3: Let’s make the cards
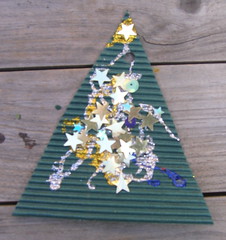
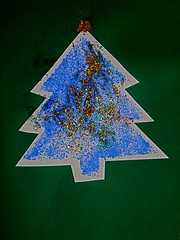
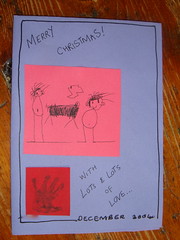
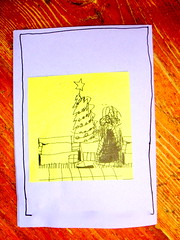
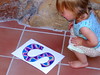
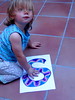
Don’t panic! You needn’t make them you can buy them – but they are expensive! And the people we are sending our cards to are friends and family, they want something from us, not a picture by someone else. Kids love arting so I never have a lack of little helpers to audition. Either decorate something and make it really simple, a tree or a star… and glitter – you have to have glitter… and you are away!
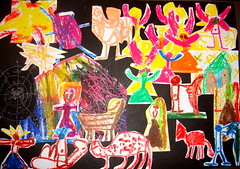
Often I will give them an art project that we can use to make a card… every one draw an aspect of the Christmas story… and put it all together for a card.
Or give everyone stickers to decorate and then we have a way to add to the card, without any single person taking the lead!
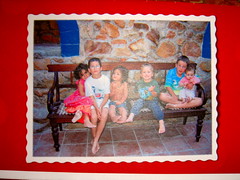
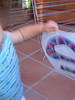
Step 4: Grab the camera
It is fun to think of ways to make cards with kids – you need to brainstorm a bit here. It needn’t be photos’ of everyone, it could represent you… socks for instance.

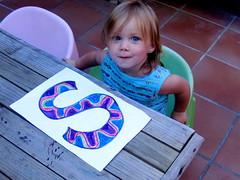
Or collage their photographs onto an artwork.

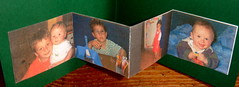
Last year we managed to use their artworks and photographs and put them all together:


That last “s” was very hard to achieve – but eventually we managed!!!


Step 5: Get the Envelopes organized
While you are getting your cards organized, remember to address a couple of envelopes daily, every day for a week or so… Don’t aim to do it all in one sitting – you will despair and give up. Trust me! But if you just do a couple every day. Three before you have breakfast, two after lunch and two as soon as you sit down at the end of the day. Before you know it you will have a pile of envelopes good to go.
Step 6: Finish up
Get your cards finished folded and packed into the envelopes, I have a lot of helpers with this – who doesn’t like putting little parcels together. Also I try and find a little flat local christmas decoration – maybe something beaded or whatever and pop it into our overseas cards. Or some Africa stickers for overseas friends. I let the kids decorate the envelopes. They are sending a gift and let’s make them from the heart. Well decorate within reason, the postal service is fairly forgiving!
Step 7: Head for the post office
This is not for the fainthearted with se7en little hoods trailing along behind you… but anyway bite the bullet! Now there are all sorts of “you have to post overseas cards months in advance” notices – No Not actually, I have never had a problem… I am not talking major packages – just envelopes and they usually take the normal time (a week or two). If you run late – go and post them anyway! I know I won’t say no to a special letter that arrives a little late.
My Goal: is to have this done by the end of November and post the first week of December. So far I have a pile of addresses, a pile of envelopes and a couple of stamps… I am waiting for a novel idea to hit me on the head so that we can get to work on it! But I have a little while to the end of the month and the envelopes are getting addressed as we blog, so to speak!
4 Replies to “Clearly Christmas: Cards in Se7en Steps…”