
We have made a Rollicking Rocket before and when the father person came home from work with a large box we knew that we needed to make a sinking submersible… It involved a fair amount of digging in the recycling… and one or two disasters before we made our prototype!!! Don’t be afraid to try things – it is only cardboard!!!
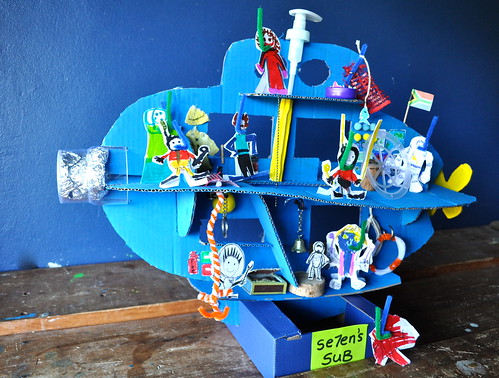
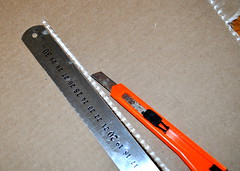
This post is how to get from a box to under the ocean in Se7en Steps… I just want to say we tried craft scissors with the thick card but it was too tricky and resorted to a craft knife. You really need an adult to do the cutting and be careful, those knives can skid about.
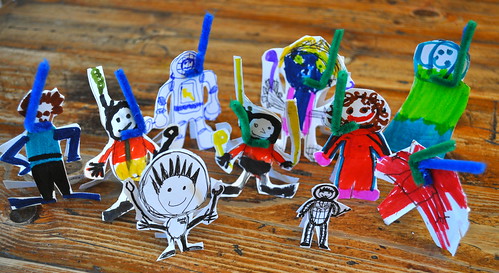
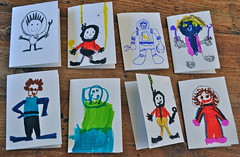
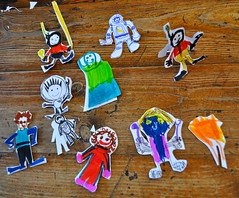
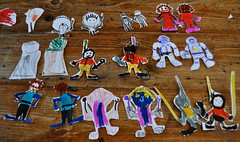
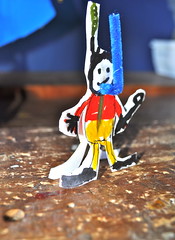
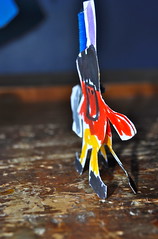
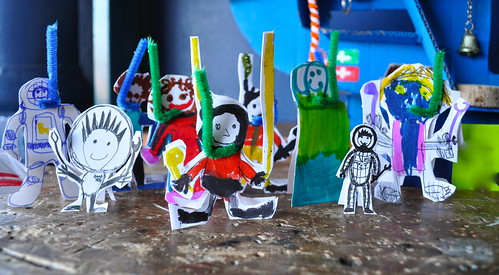
- The Dive Team: We started with scuba divers, because there is just no point in having a submersible if you can’t go underwater with it. We also needed our divers to be able to stand for playing. We drew our divers onto a piece of card folded in half. Then we cut them out. We put a dab of glue onto their heads and glued them together. Then we drew the back of the diver onto the back piece of card. A dab of glue and a snippet of pipe-cleaner provided the snorkels. Then we stood them up and ever so slightly spread the front and back of the card at the base. And there we have a bunch of divers standing and good to go.
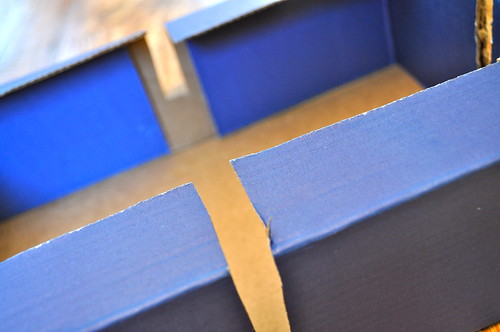
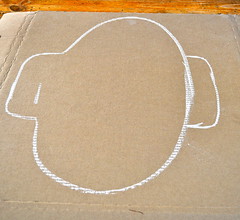
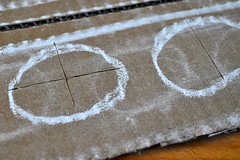
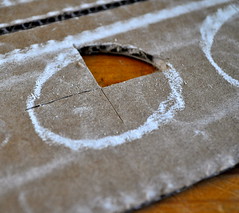
- Dealing with the Cardboard: We figured out the pieces we would need to construct a submersible and cut them out. We added some slots for piecing it together. When you are working with really thick cardboard it helps to draw in chalk… you can wipe it off with a damp cloth when you are done. When you are cutting slots, don’t just cut a line but actually cut a little strip out of the cardboard, it makes for a much better fit. And use a ruler, obvious to most, but I never measure anything. If you want a snug fit then the lines have to be straight.
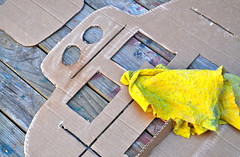
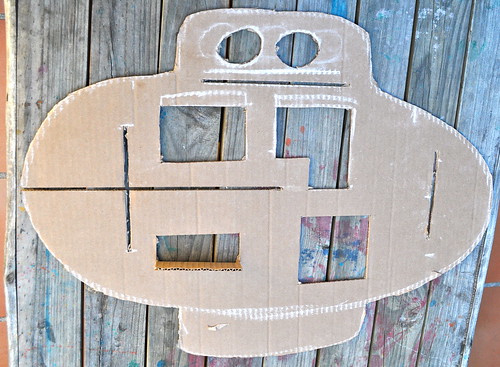
- Architectural Features: We added a few windows, doors, a bunk-bed and a staircase between the decks. And another cardboard tip: If you have to cut a small section from thick cardboard then cut a cross through out the section then cut along the edges and pop them out bit by bit.
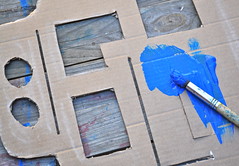
- Putting the Ship Together: We dusted off the chalk dust, splothered it with paint and put it together and then we began working on special features.
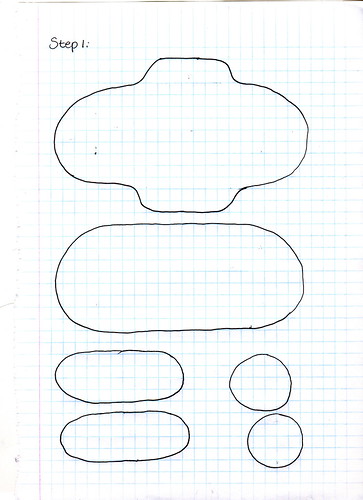
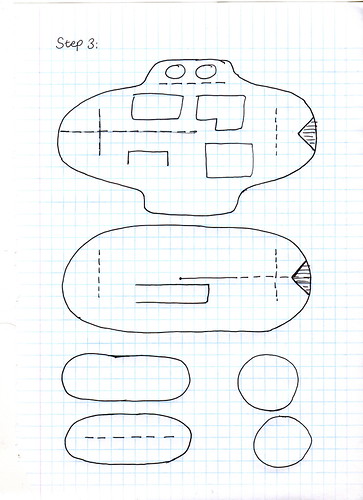
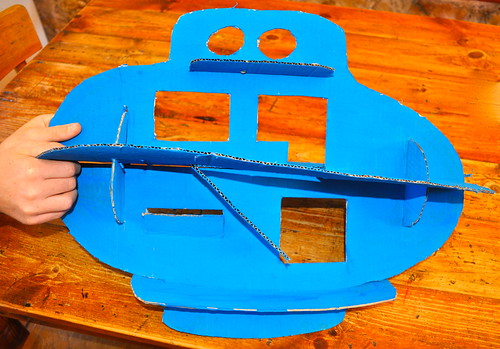
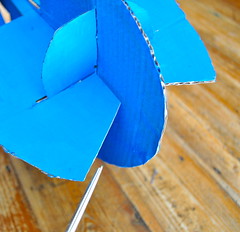
- We cut out the two main body pieces. one vertical with a keel and a turret, and then one flat oval for the main deck. The two smaller rectangles are upper and lower decks. The circles provide stability for your vessel and stop the vessel from collapsing flat.
- Then we cut a number of slits in the cardboard for fitting it together. Just slot the letters side by side…
- Finally we added windows and doors, a stairway and a bunk. Once we made a propeller we realized that we needed to cut out a gap at the back of the vessel so that the propeller could spin easily.
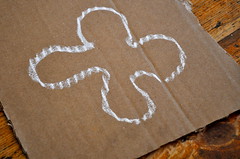
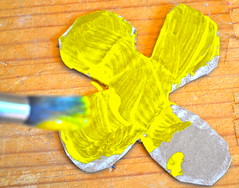
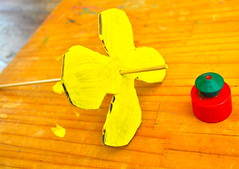
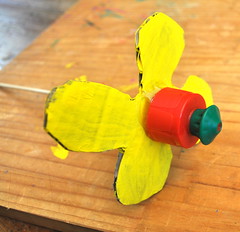
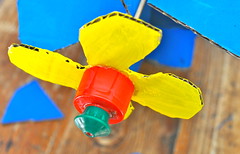
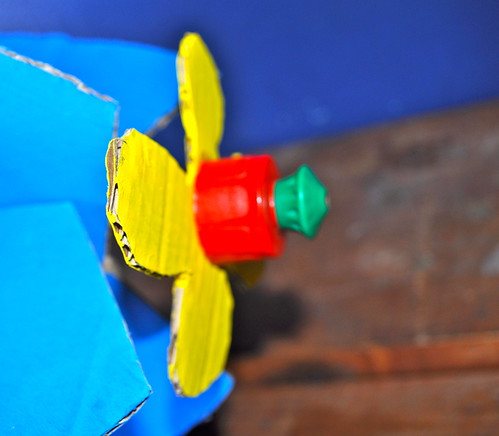
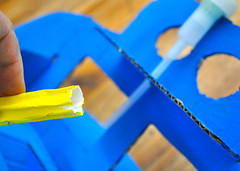
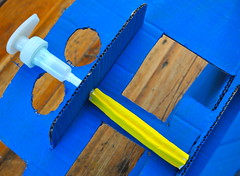
- A propeller: Cut out the shape of a propeller; splash it with paint; poke it through a wooden skewer, so that it will spin when it is attached; glue a bottle top to the end so mo-one pokes themselves on the skewer; Slide your propeller shaft down the central join of your sub and trim the end of your vessel to fit it the spinning propellor.
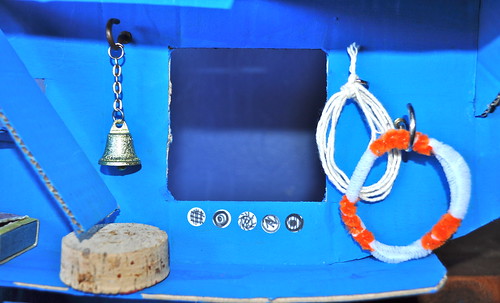
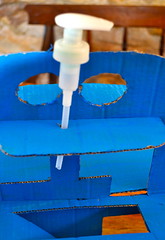
- The periscope: Make a small hole in the uppermost deck and poke a squirty bottle dispenser through it, roll some card to form a ring and attach it to the deck below, slide your periscope into the top of the ring and you are done.
- And some interior decorating: Here is a quick tip… Make two notches in a box, we used a fruit box but even a cereal box will do, so that you can pop your submarine’s base/keel into them and then you can stand it up and work on the details.
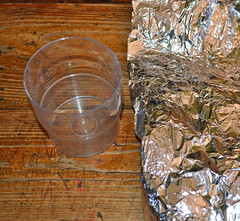
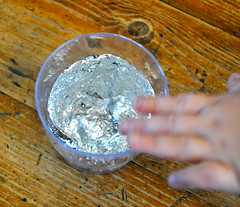
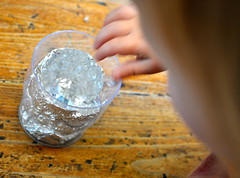
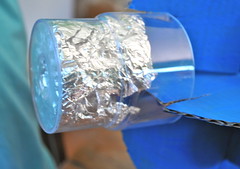
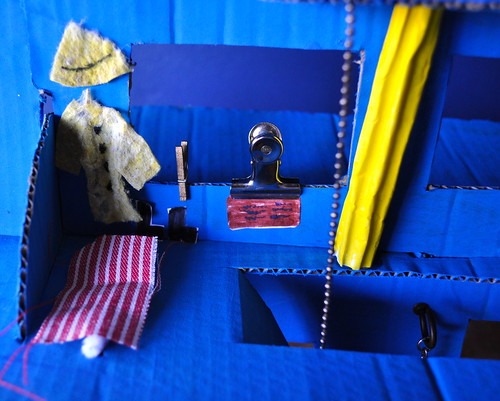
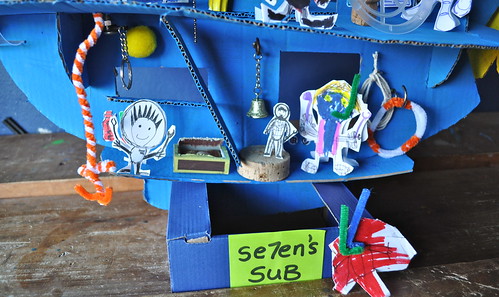
Otherwise we raided the recycling, the junk drawer and the button box for this section, it was the best of fun!!!- We made a lamp: Filled a recycle container with tin foil, cut slits in the front of the submarine and attached it:
- Fishing for breakfast:
-
A wet room:
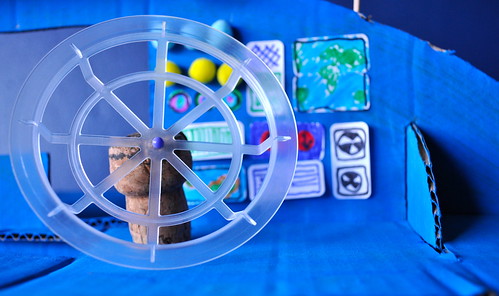
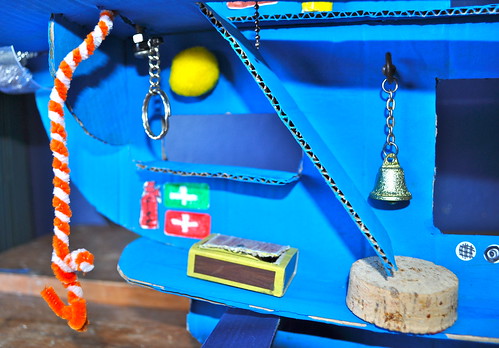
- A Control center:
- A Bunk room with first aid and a trunk:
- And a ship’s bell of course!!! We found it in the button box…

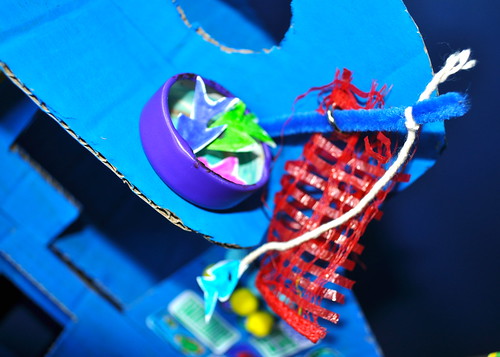
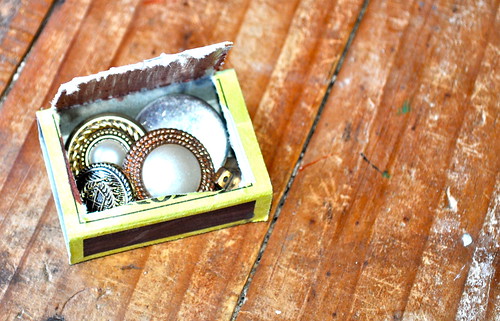
And in the trunk was… button box treasure!!!
And the Se7en + 1th thing…
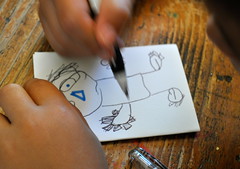
- Finally the ship’s crew arrived and was ready to get going:

Let’s just pause, and take a look at the cutting we did, step by step… Obviously you can do it anyway you want to and scale it according to the box you have… Here’s what we did:


Here it is: painted and put together and ready for some artistic intervention…
Above Decks:
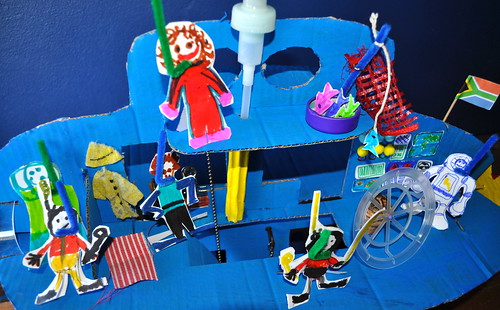
Below Decks:
And away they went!!!
Hope you enjoy it… If you are looking for more Crafty goodness then follow the link to our Complete Craft Collection.
What a lovely work! So detailed and colourful! First aid and treasure chest…you have thought about everything 🙂 And I love the little people.. they are so cute! I´m speechless.. it `s such a wonderful work!
So crafty, clever and cute!! Well done!
Hi Mermaid, Thank-you, so glad you liked it!!! Have a great week!!!
Amazing! And love all the details. I’m always so impressed by how willing your kids are to spend time crafting! I guess that’s one of the great results of homeschooling? thanks so much for sharing on Craft Schooling Sunday!
Hay Karen M, So glad you like it, it was a lot of fun to put together!!! Hope you have a fabulous week!!!
Hay Creative Jewish Mama… Glad you like it!!! My kids love crafting – I never have to ask them!!! EVER!!! They are mostly getting to an age where they craft on their own thing almost continuously – it’s wonderful… they make the most amazing things. Lots of fun to be part of it all!!! Thanks for your great Craft Schooling Sunday Link Up… I just love it!!!
Oh my word, this is just the cutest thing EVER! You come up with such wonderfully crafty and original ideas! I love it!!
Maggy
Kids Get Crafty
Hay Maggy, So glad you like our submarine!!! I loved your post on stamping so I think we are fair and square!!! Have a fun week!!!
Hello hello, I featured you on “Water Get Crafty” (Seaside & Summer fun) today!!! I love your submarine – http://www.redtedart.com/2011/05/01/water-get-crafty-fish-summer-crafts-to-inspire-you/
Maggy x
PS I have a weekly link up on Wednesdays (until Monday) latest is here http://www.redtedart.com/2011/04/27/kids-get-crafty-sand-art-crafts/ would be so nice to see you and your fab fab crafts there