I promised I would write a post on car maintenance… When I was in high-school, an all girls school for young ladies, we had a weekly class called Youth Preparedness, where we had to march up and down the hockey field in white boots brandishing sticks all in the name of drum majorettes. Can you believe that!!! Anyway there were a handful of us that flatly refused and after a couple of weeks of causing havoc in the ranks, literally, they offered us the choice of car maintenance. Apparently we were interfering with the chances of winning the local league. And I think they thought we wouldn’t go for it!!! Anyway, for the first time ever there was a choice!!! And our science teacher was delegated the task of teaching car maintenance – for young ladies, of course. I will never forget the look of the headmistresses face when she came to see how the class was doing and discovered the teachers parking area covered in tyres… as we mastered the art of the “quick wheel change…”

To that end I decided the time had come to teach my children about the Pitstop… Se7en + 1 easy car maintenance skills that we use all the time. In the world of specialists for every job the whole area of “car maintenance has gathered a bit of mystique” and there are people that never ever peer into their engine but I tell you the truth there is not too much mystery under there, it is a machine that needs certain things to work in order to perform at its best. I have friends that have no problem delving into the depths of their laptop or dismantling their sewing machine… a car is just the same, another machine that needs to be maintained. Some tasks are weekly, some are seasonal and some are strictly for emergencies… it is good to have these skills learnt because in a crisis it really helps to have a calm, collected person knowing what to do.
- Checking the Water:
- Checking the Oil:
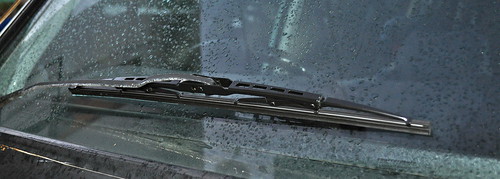
- Changing a Windscreen Wiper:
- Changing a Spark Plug:
- Changing a Tyre:
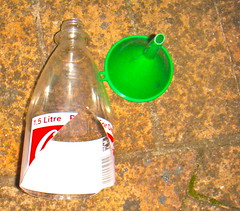
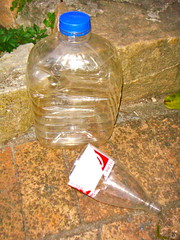
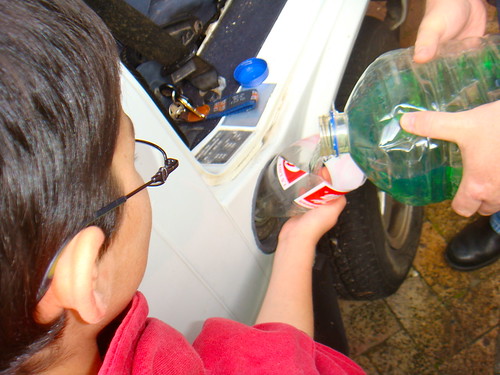
- Filling the gas tank: My mother instilled in me a fear of running out of gas… I blame her very much!!! When her gas tank gets to half way she fills up… Well the reality of my life and the price of the stuff means that we always have just enough to get where we need to be… and just enough isn’t always quite enough!!! Filling up with gas when you run out is not actually the hardest thing on earth and you don’t actually have to call a mechanic!!! You just need to keep a large bottle in your car – our car needs five liters to get rolling again… and a funnel. Not any funnel… It has to be of the largest size otherwise you will slop and spill everywhere. A sawn off soda bottle works best for the job – really I know!!!
- Jump Starting a Car:
- The Tool Box:
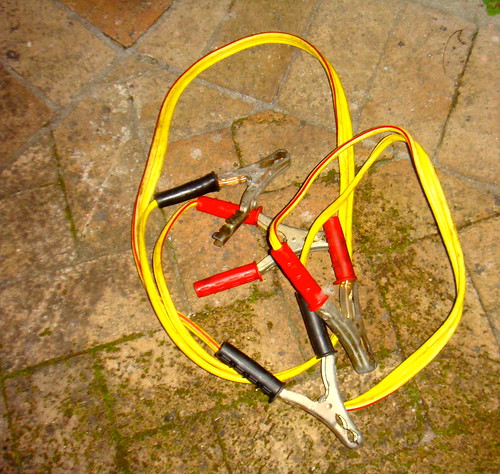
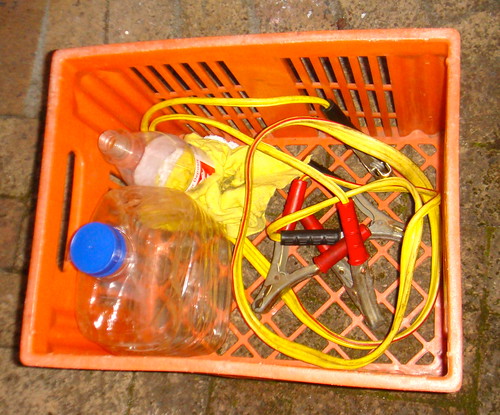
- It has cables for a jumpstart;
- A bottle and chopped off soda bottle for running out of gas;
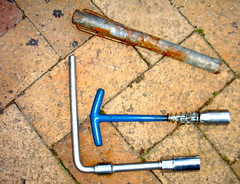
- a spark plug spanner;
- A tyre change kit: spanner and jack.
- Until a week ago I had spare windscreen wipers, but their status has changed to on!!!
- And a rag and a bottle of oil, for topping up the oil.
- A tow rope, you can buy them at the hardware store and trust me, they are so worth having when you need one!!!.
This is weekly job, my guys usually do this on a Saturday morning.
Find your water tank:
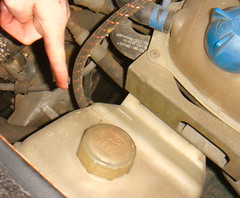
Screw the lid off:
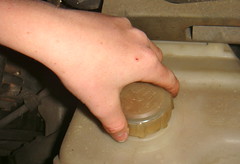
And fill it up to the water level line on the side of the tank… it is that easy!!!
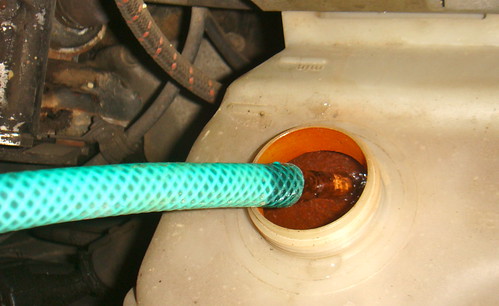
This is a weekly job, a quick Saturday check over… and doing this yourself will save you the most amazing amount of money!!!
Here’s the saving: If you buy your oil at the gas station by the can and have someone else pour it into your engine you will easily pay four if not five times the amount for the oil. We buy ours at the grocery store and I just can’t justify buying it at the Service station.
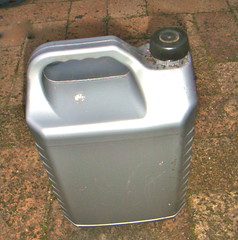
Generally if the oil light is blinking while driving then you need oil already!!! Cars need oil to run don’t make the mistake of going just one more day… because you will end up with a nasty and expensive repair!!! So find the oil tank… Next to your oil tank there will be a little tube with a long stick, called a dip stick poking out of it… That’s for measuring your oil level.
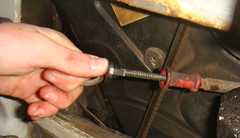
Pull the stick right out…
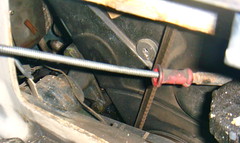
Wipe it off on a cloth…
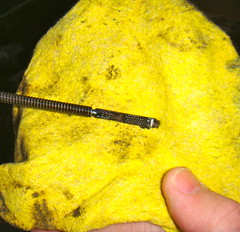
Then return your stick to the tank and take a fresh reading…
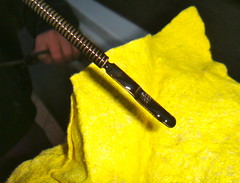
Open up the oil tank…
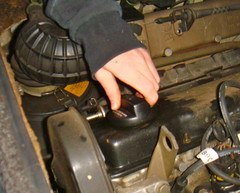
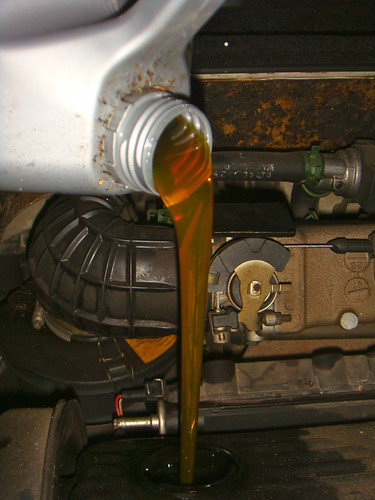
And fill it up to the level line, if you don’t have a level line then just use your dipstick to measure the level.
This is a seasonal task, you don’t have to do this weekly at all. But if I had known how easy this was I would have done it months ago. Head over to the hardware store and buy the new blades. There is no trick to it, you just have buy the blades to match the model of the car you have.
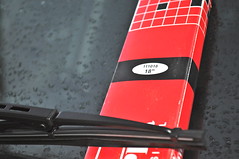
And then it is all about the hook…
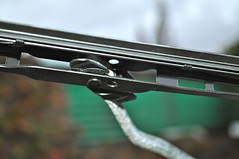
Unhook the old wiper…(yes it was old!!!)
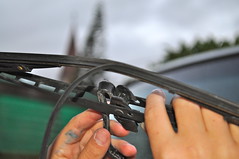
There’s the hook…
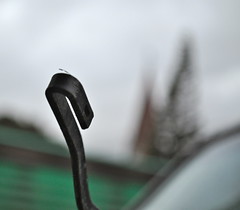
And hook the new wiper blade on…
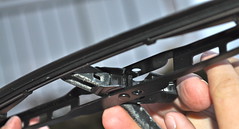
Click it on securely…
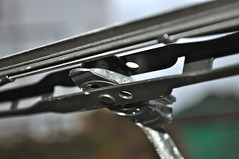
And you are done!!!
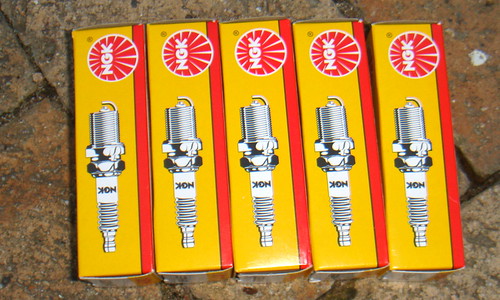
From time to time you need to change your spark plugs. It pays to have a fresh set of spark plugs at the ready, when we replace ours then we know it is time to buy a new set ready for next time.
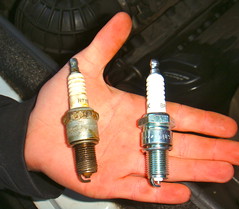
Spark plugs just get grotty and your car will start to sputter. Here is the difference between an old and a new spark plug, kind of obvious!!!
Spark plugs are hidden under these black cable covers…
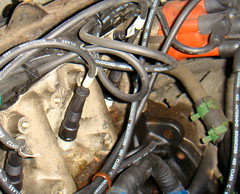
Lift the cover…
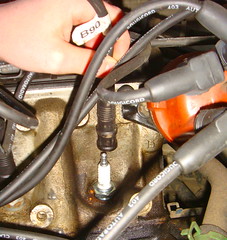
And there you are:
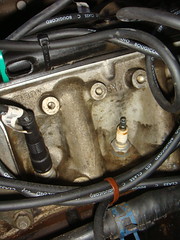
To change a spark plug you need a a special tool and it can look like anyone of these:
Pop the tool on and twist…
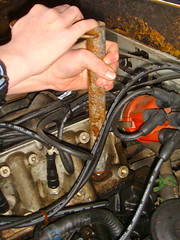
Out comes the old spark plug…
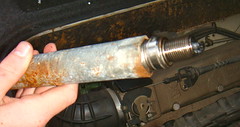
Put the new spark plug in…
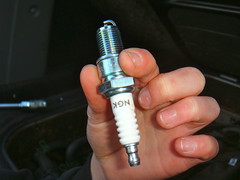
And reverse the process… screw it back and put the black cover over it. That’s it!!!
This is not a maintenance trick but rather an emergency skill that you have to know. I may have learnt this at school but the first time I needed it I was eight months pregnant with a bunch of toddlers in the car. I found myself belly down groveling away under the front of my car trying to retrieve the spare tyre… this is why it helps to practice!!! Cars like ours keep the spare wheel under the front – I know only a man could have thought of that… but that’s how it is and we live with it!!!
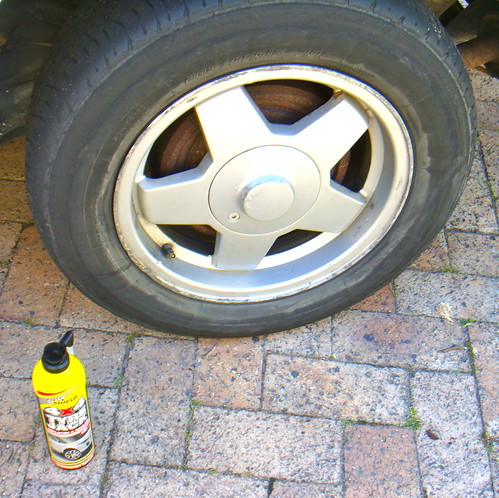
If you flat out refuse to learn how to change a tyre or if you are in an area where you really shouldn’t stop at all, let alone for the ten minutes it takes to change a tyre, then it is very handy to have one of these cans of spray air in your car… They seal a reasonable puncture and you can drive far enough to get yourself somewhere safe to do the actual tyre change. These cans are so easy, just attach the plastic to the valve and fill up your tyre…

Having said that it is so easy to change a tyre that you may as well set yourself the task of learning how. A skill worth knowing, it may save you an awful lot of stress one day!!! Your car will have a spare tyre kit – with a jack and a spanner. It has to come with one for the roadworthy. Go and find it is in your car somewhere. The first thing you need to do is find your spare tyre and see that you can easily get it in and out of its tray. I had to master this for our car, it wasn’t quite as trivial as tossing it in the trunk I actually have to unlock it and lower a little shelf to slide it in and out, tricky but not impossible.

Also, safety first, make sure your car is parked in gear and the handbrake is on, the last thing you need is your car gently rolling off the jack.
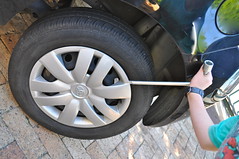
Onto the change: Loosen the hubcap if you have one and loosen the wheel bolts, but don’t unscrew them. Work in a pattern to loosen the screws: one then the opposite one and so on…
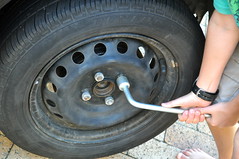
Now it is time to put your car on the jack, there is a special little place for the jack to fit, if you aren’t sure where this is look in the manual because if you get wrong your car will not jack up safely or the jack could slip and go right through the floor of the car… it has special place, get it right!!!

Raise your jack higher than you expect because you will have to fit a new air filled tyre into the gap.

Now is the time to finish unscrewing your bolts and put them somewhere safe as you go, like the hubcap.

Slide the troubled tyre off.
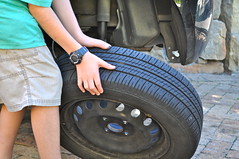
And replace it with the spare tyre.

Return the nuts to their bolts and screw them on…
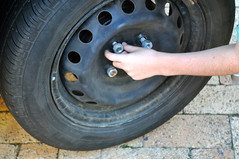
Nearly there, lower the jack and tighten the nuts in the same pattern you loosened them.

Hubcap on, gather up your tools and you are done.

Make sure you get your spare tyre repaired or replaced because you just don’t want to be caught driving around without one.
Here’s what you need:
And here’s how it’s done:
Another common problem is the car that won’t start because the battery is flat – how often have you left your lights on and heard that hideous click when you try and start it… literally the brrrmmmm has left and your car is out of energy. This is why you keep a set of jumper leads in your car, even if you don’t know how to use them you should be able to find a knight in shining armor to help you with this. It is a two second trick to learn and well worth mastering all you need is a set of jumper leads and another car that is running…
Position the cars as close together as you can. And turn both the cars off. Determine which is the positive and negative terminal on both batteries, “plus sign” for positive and “minus sign” for negative.
And now you start cabling…
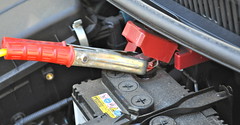
Step 1: Clip the red clamp onto the positive terminal of the dead car.
Step 2: Clip the other red clamp onto the positive terminal of the live car.
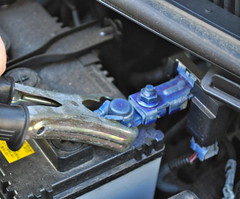
Step 3: Clip the black clamp to the negative terminal of the working car.
Step 4: Clip the black clamp to the negative terminal of the dead car. (Some folk clip the last clamp onto the body of the car to avoid a power surge, there is nothing electronic in our ancient car so not a problem).
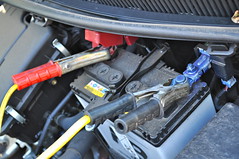
Turn on the working car, and once it is running turn on the dead car … it should brrrrm on!!! Whatever you do don’t turn the “freshly revived” car off… because the engine needs to run to charge the battery. Disconnect the cables in the reverse order that you clamped them, and make sure not to touch the clamps together, it will short them and the results are simply shocking. Now toss your cables back into your revived car, whose engine you KEPT running, and just keep driving for a couple of kilometers, giving your car long enough to charge the battery.
And the Se7en + 1 Thing:
In my car I keep a crate, we are not talking aesthetically pleasing here, purely functional!!! It has built up over time as an emergency has arisen so the necessary tool has been added to the kit.
And then there are countless things I don’t keep in the car: I don’t keep spare changes of clothes, or wet-wipes, or water bottles, or snacks or games or entertainment. We don’t eat in the car – ever. It keeps it so much cleaner. And we don’t do take-outs, so no drive through junk. Really if we go out it is after breakfast, after lunch or we are off to a meal. And a half hour drive anywhere it isn’t going to leave us starving to death!!! When we do go on a trip in the car we take what we need for that trip and when we return home we empty the car, fresh and new for the next time!!! So no forgotten shoes, no piles of paper, no half read books, stinky gym bags, and no crumbs… it just makes for a smoother ride.
That’s it!!! Car maintenance 101. Of course I have to provide a proviso here… don’t take my word for any of this, check with your friendly mechanic before embarking on any sort of car maintenance project. Seriously you don’t need to pay someone because you have a flat tyre or a flatter battery… you really can fix it yourself.

Bravo!! Awesome 🙂 I so appreciate all the time and effort that took. I´m inspired! Can’t wait to start teaching these young-uns. They’re gonna love it!
Hi Karyn, Oh I hope you have fun!!! My kids have been able to use their skills to help friends and surprise neighbors!!! Really these are great life-skills for kids to get under their belt!!! Have a good week!!!
What a great post on car maintenance- I loved all the photos and instructions! Thanks for sharing!:)
Hay Tonya, Thanks for coming back to comment!!! Glad you liked the post… not the most thrilling topic on earth but my kids loved it and it has proved really useful over and over again!!!
I think this is amazing that you taught this to you kids. I plan to the same. I knew how to pump my own gas, change my tires, oil and filter and even did brakes and shocks. Not bad for a girl : )
But keeping gas in a non-approved plastic bottle is a bad practise. Gas vapors expand in the heat inside of a car and can cause combustion. Proper gas cans have spring fitted lids for venting and flash-arresting screen. Small investment for safety if you make it a practice to carry gasoline in your car.
Hay Cindy, Thanks so much for your comment… And you are so right about Gas Vapors… we never carry fuel in our car at all… I wouldn’t dream of it, especially with a bunch of kids. But we keep the bottle there as a handy funnel for when we run out of gas… Thanks so much for stopping by and have a great weekend!!!
Hmmm, this has motivated me to look into changing my own oil now. About the jack, when my dad changed my oil he would just drive the car up onto a curb! Curbs can’t collapse 🙂
Great tips and thank you for sharing them. It’s also important to keep a checklist every time you will do some car maintenance, just to make sure everything is all good. Cheers!