
This is Step 5 in my Se7en Steps to a Good Party Series… and is all about that vital pinata. Kids love a pinata. The surprise of what’s inside them. Being allowed to smash to their hearts content.
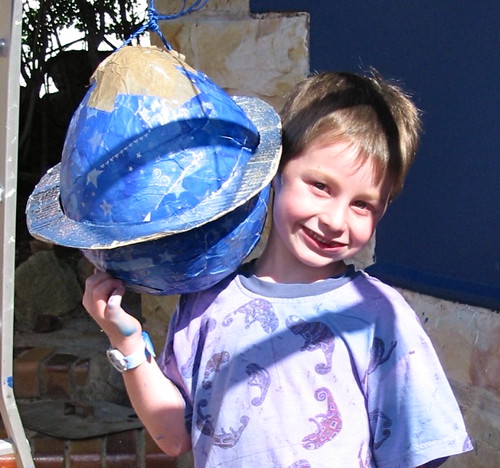
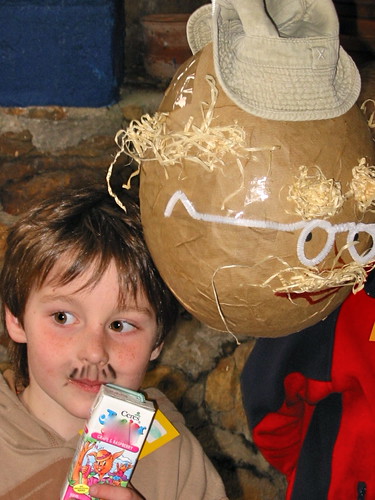
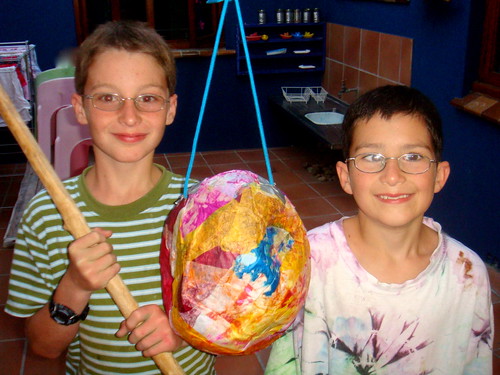
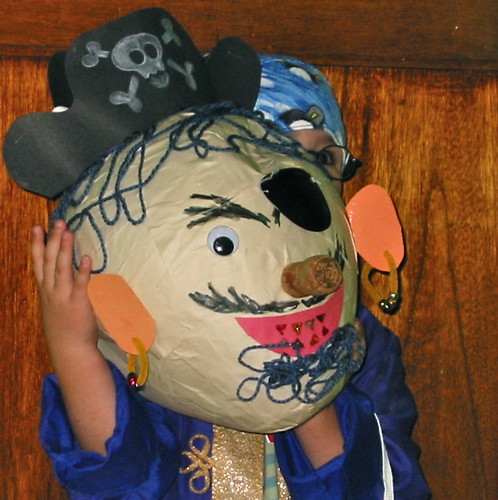
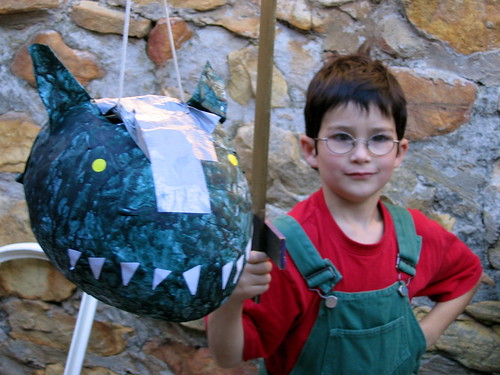
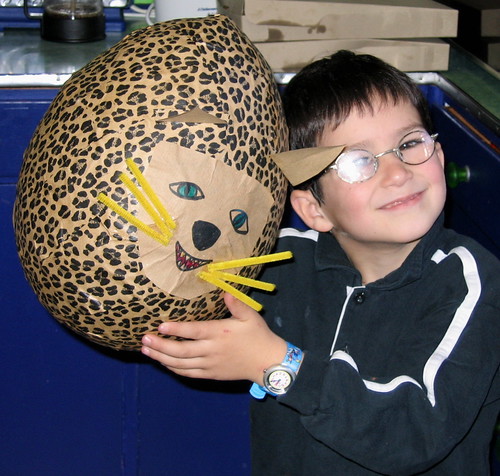
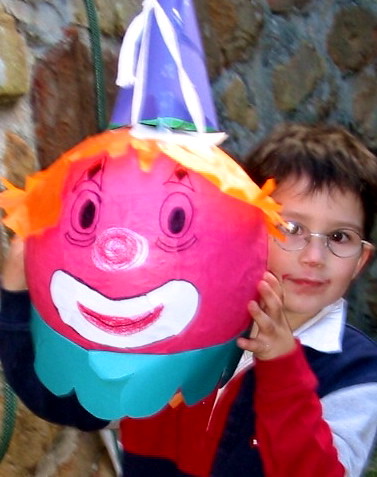
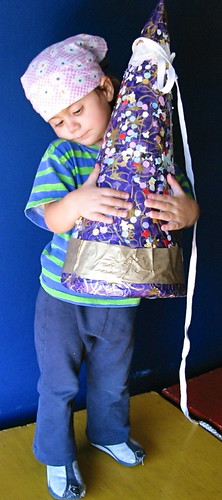
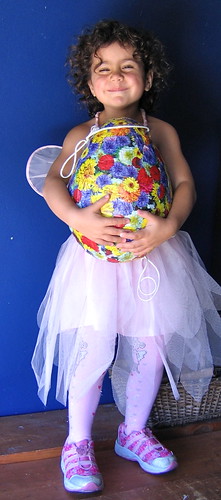
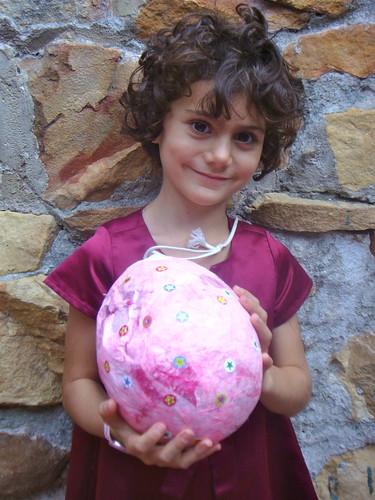
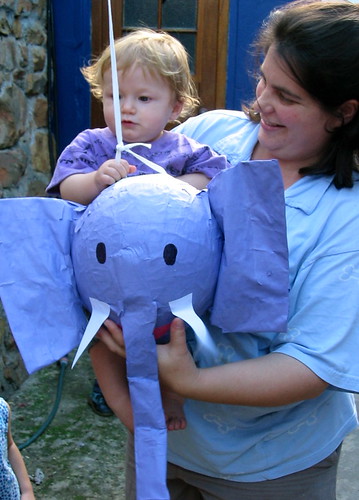
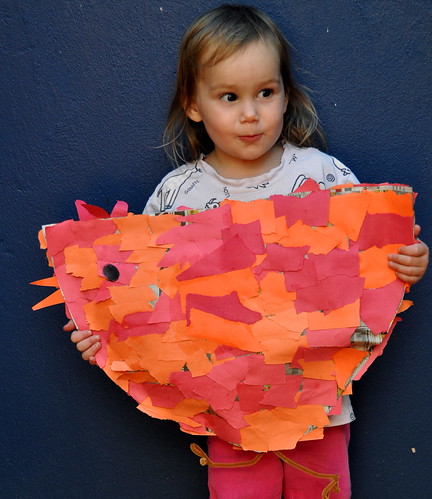
Kids are also very forgiving, when artistic talent fails you – never fear if you announce what your pinata is, trust me, they will believe you. My children all know they will have a pinata at their party, but I keep the final “what is it?” to just before the party, when I take their photograph – I have tried to have a pinata picture for every party.
Let’s just quickly talk about what to put inside. There are criteria here: Whatever it is has to be light, your pinata can get weighed down really quickly, and they have to be durable, the items will finally come crashing down – things like lolipops shatter and then can’t possibly be eaten. Whatever goes in needs to survive the dive:
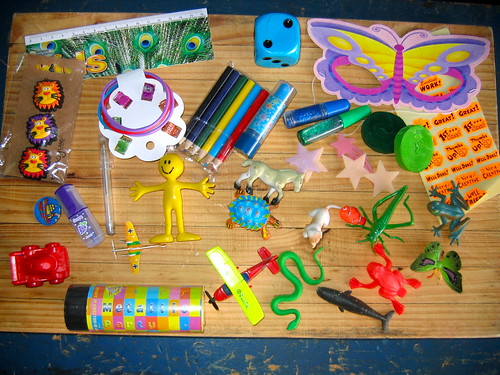
So what can you put in there… anything to go with your party theme… and then:
- Bits of nonsense: streamers, party poppers, glow sticks, paper masks.
- Tiny Toys: plastic animals, dice, badges, fridge magnets, hair clips.
- Candy – we usually put in a little roll of sweeties for each child.
- Tiny Crafty things: Little glitter glues, tiny glue sticks, stickers.
- Stationary: little pencils, erasers, highlighters, post it notes, bull dog clips – stationary and you have conquered all party goers.

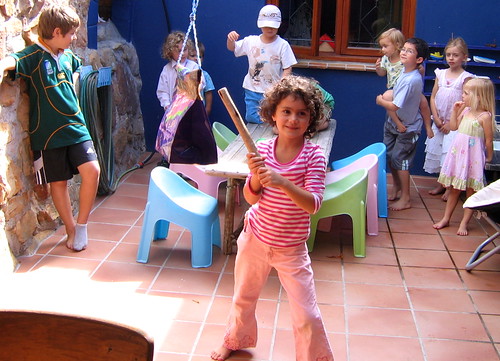
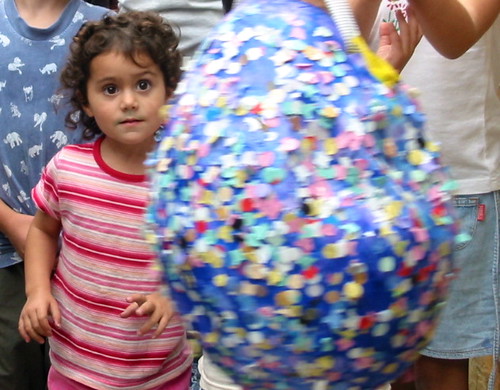
And lets quickly talk about the smashing up part – before it gets lost in the last gasp of the post. We keep a short piece of broomstick specifically for the task. Make them line up shortest to tallest, and let the little guys go first. Everyone else must stand well back – and you will need to keep repeating this! All you need is the biggest guest to go first and smash it before everyone has a turn. That being said, I have never had one get smashed too quickly – usually the latter and everyone has more than a few turns.
There are four types of Pinata that I make for my kids parties:
Type 1: A Party Bag:
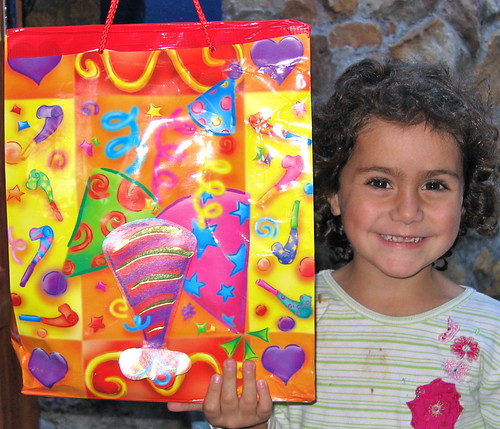
This is the quickest and easiest and can really be done on the day. Yes, on the day!!!
Take a gift bag, they are usually made of good, quite durable material and you can choose one to match your party theme. Right, take a gift bag and stuff it with goodies. Then tape the top closed with packing tape and you are done!!! I first used this for a little girls “Bag Party Theme” – and I have used it often since then because it is so quick and easy.
Type 2: Mini Pinata:
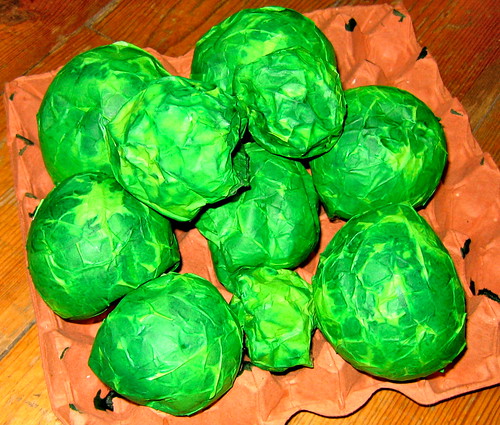
I saw these first on Not Martha and fell wildly in love and had to try them at our next party. They are made with layers of tissue paper (two was enough) and the layers dry really quickly – they took two days to make – so that’s the time frame!
Here is what I did: a little less refined than Not Martha’s but hay, I was catering for 5 year olds!!!
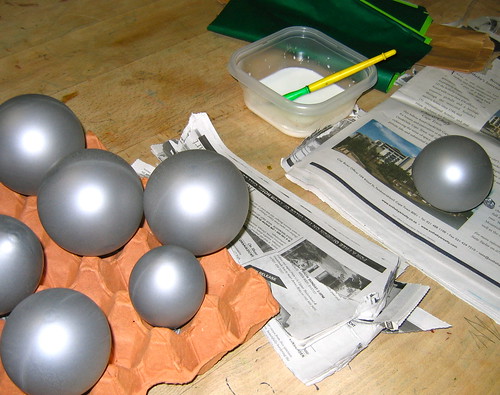
You will need:
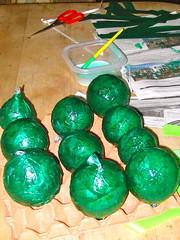
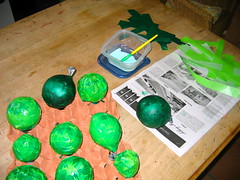
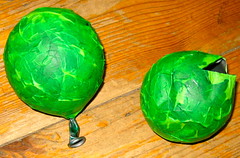
I cut the tissue paper into strips and covered each balloon in a layer of dark green and pasted the strips in glue as I layered them on. Then I left them to dry overnight. The following morning I layered them in light green tissue paper also smothering them in glue as I went. They had a nice mottled look as the different layers shone through. And I left them to dry all day. That evening they were dry and I cut a slit in each pinata and took the balloons out. Then I stuffed them with little treats. They were fantastic green eggs at a Dr. Suess party – they were stuffed with turtles (Yertle the Turtle) and a streamer each. Then covered the opening with a layer of tissue paper and left them to dry overnight. They were perfect for the party the next morning.

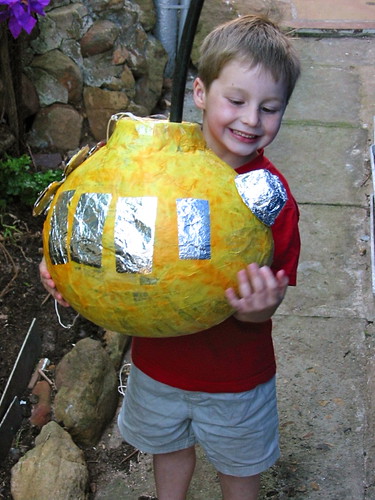
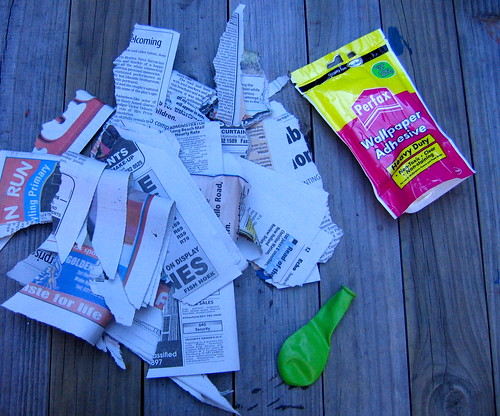
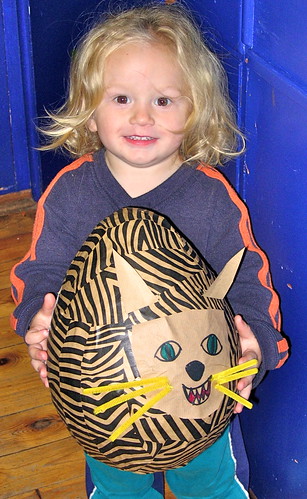
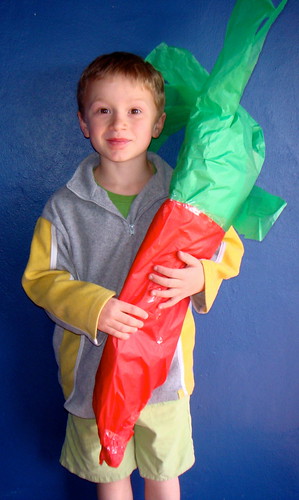
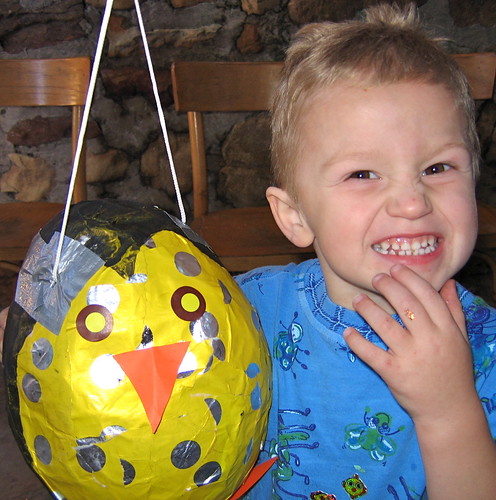
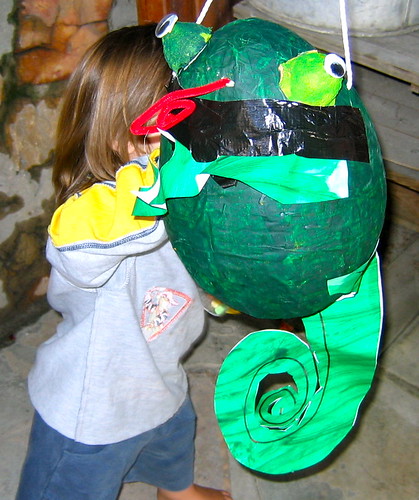
Type 3: Traditional Pinata:
This is the most time consuming and takes about a week to get it right, even during the worst weather. The first time I made one of these I thought it would be a complete mission to achieve, but really they are easier than you think and not nearly as messy as I expected.
You will need:
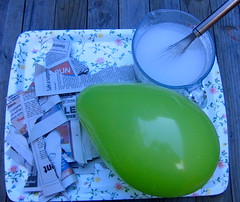
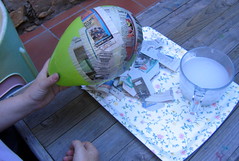
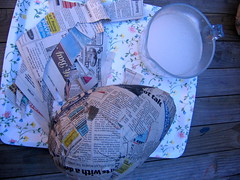
Mix your your wall paper paste according to the instructions and blow up your balloon. Cover your balloon in a layer of newspaper, smothering lots of paste on a you go. Only place one layer on at a time, this should take about fifteen minutes at the most. More than one layer won’t speed up the project because then it just takes so much longer to dry. Leave it to dry completely, over night if need be, between layers. We leave them lying in the garden like giant dinosaur eggs until they are dry (I never noticed the pigeons sitting in this picture!!!). I usually do three layers of newsprint before the mad decorating begins. And you can go quite mad here… The last layer I do in colored paper or even gift wrap. Once that is dry it is easy to add on stickers and eyes and whatever else seems to be essential. Once this is completely dry I slit it and remove the balloon… then stuff it and use strong packing tape to reseal it… off they go…
Here is a final, friendly word of warning and try not to die laughing, don’t leave this project too late! One time I did run out of time, so I thought I would place the newsprint covered balloon in a slightly warm oven and well lets just say: scientifically speaking… hot air in a balloon expands… but the balloon can not expand because it is covered in a newspaper skin… and while you are merrily icing the cake in a last minute dash – there is a loud kadoof as your pinata explodes!!! Let’s just say shrapnel – Do Not Try This At Home Folks!!!
And a Gallery of ideas:

Type 4: The Quickest Piñata in the world:
I have been using this type of Piñata a lot lately, and it got it’s own special post… basically glue layers of newspaper together decorate and go… follow the link to find out how…
Happy Popping.
More on Party Tip #6: Party Food and Especially Party Cakes… in the next installment in the series: Se7en Steps to a Good Party Series…

Fabulous. I will have to try that. What fun!
Hay dd… These little pinatas are a lot easier that they look and they dry really quickly because they are made of tissue paper. Also I love the challenge of finding sneaky little things to pop inside of them! You have a great weekend!
We’re going to be trying one of these for our next birthday … April 13th Keira turns 3 so we’ll let you know how it goes!
Hi J, nice to hear form you again! Get started on that Pinata and I hope you have a great birthday together!
Oh no! Have I left this too late?
My first born turns 5 this week with a party on sunday and I thought I’d have all week to try out making the big pinatas to see which worked. I read I could use 2 cups flour with 3 cups water as a paste/glue, will this work? Where would I buy wall paper glue?
Thanks for a great post/ series anyways, lots of excellent tips. I assume it comes from experience. I have 3 (aged nearly5 ,2 and a half and 7 months) and need all the help I can get.
Keep it up
Hi O, No it’s not too late!!! I have tried with flour glue but I didn’t have great success because it takes longer to dry. (And I always leave it too late!) But with a whole week and warmish weather you should be ok. It doesn’t take long to make: about fifteen minutes to add a layer but then you have to wait until its dry before adding the next one. Otherwise it looks dry on the outside but is still soggy on the inside and ruins your little surprises. I sometimes get wall paper glue in the hardware department at the larger local supermarkets… next to the paints they usually have a small wall paper section. The local hardware store also sometimes have it – but not always. The big homeware/homemakers stores that have everything from tiles to plants always have it – if I am desperate I drive a bit further and get it there. Meanwhile if it does get late and you run out of time then use a gift bag – it really works well and is a great alternative!
It turned out really well, too well! We ended up having to hook in the unbrella handle and rip it open… The littlies were getting impatient after they each had 2 goes.
Hi O, I am so glad your party went well – especially the pinata. It is surprising how strong they are! Hope you have a great year before you make the next one!!!